Tuesday, December 2, 2014

Zig Zag Card


Hi fellow Stampers
Check out this amazing Zig Zag card that I made the other week for a special friends birthday. She loves things vintage so I kept with the neutral shades with only a splash of colour.  I was very pleased with the way it has turned out, and me friend has not gotten around to making one of these yet so this will provide the inspiration to get her started.  Double bonus..
Here is another one I made recently for a beautiful girls graduation..
I have had a lot of great response from these cards and therefore I will be holding a class in January making this style card..
Thanks for looking


Card in a Box


Hi Stampers, 

I know I can't help myself, the card in a box is my all time favourite technique.  Here I have used it with this great beer mug stamp (sorry non SU ).  I made this card for a friend yesterday without the 
21 on it though, and I think he really liked it so I decided it was worth it to make some more.  
Thought the word bubble dies from Stampin Up were a great edition to the design.  I even managed to find a little puff appliqué in my stash to make the froth more realistic.  Hope this inspires you to give it a go.  
Measurements for the card in a box size that I have used are as follows.
- start with A4 card and place on simply score horizontal across the top.
- score at 7, 14, 21, 28 cm
- turn 90 degrees and score again at 7 cm
- remove from score pal and cut at 15 cm ensuring that you measure this from the same side that you scored your last 7 cm 
- from the remainder scrap card cut a piece at 10.5 cm from the side where the 28cm score was made.
- cut this small piece in half lengthwise this will from your two bridges 
- cut with scissors on each of the score lines made on the narrower side up to the centre score line. 
- trim away the small tab before adhering the box side together.
- fold the two bridges into z shapes and apply glue before sitting them inside the box
- decorate as desired.


Sunday, November 9, 2014

Festival of Trees


Hi fellow Stampers,

Yesterday's cardmaking workshop was all about Christmas and what better stamp set than Festival of Trees from Stampin Up.  Combined with the matching punch, you can create many different styles of cards with this one set.  I love the fact that they are photopolymer, which makes it so easy for placement of the two step stamping technique.  That and the fact that they do not "fall" off the blocks.  Here is a closer picture of the three different styles I created from this one stamp set. 
                                                      COOL CHRISTMAS
                                                         Stepper card

TRADITIONAL CHRISTMAS
Centre cut out card
VINTAGE CHRISTMAS
embossing and distressing techniques


Thanks for looking


Sunday, October 26, 2014

Annual Lioness Craft Fair


Hi everyone, 

Today I want to share with you some photos of my little craft stall that I had at our annual Lioness Craft Fair.  This craft fair has been going on for about 7 years now but this was the biggest one I have been too.  A big congrats to all the organisers of the day for making it a successfully run event.  Thanks to everyone who visited my stall, commented on Facebook at my pics and who bought a little something to help feed my habit.  I absolutely love what I do and enjoy sharing with all of you.  THANKS

Thursday, October 9, 2014

Birdie Wedding


Hi Stampers,

Love is in the air around here, and I have been asked to make another wedding card for someone. I cased this idea of Julie JapesHere , a very talented UK Stampin Up Demo.  This look was just perfect for the colours that I needed to compliment the wedding theme.  I had some left over Natural Cosmopolitan card and used some shimmer card as well to bling it up a little.  Hope now that the recipients like it.  
Thanks for checking it out.  xx

Wednesday, October 8, 2014

Perfect Peacock


Hi fellow Stampers,
This stamp does not require much introduction, the name "Perfect Peacock" is just that.  While this image would look "perfect" coloured with blendabilities, as I have seen on Pinterest many times, I had to try out simply embossing with white on black first.  I first saw the concept here by Diane Roberts.  Thanks for the inspiration Diane. I turned my card into a 15 x 15 cm Twisted easel card for something different. The pearls on the tail feathers finish the stylish look.  

Thanks for looking.


Monday, September 29, 2014

Traveller meets World Map


Hi Fellow Stampers,
 
I wanted to share with you all a card I designed for one of my recent workshops.  This card uses the Traveller stamp set from Stampin Up which is one of my favs for men out of the recent catalogue.  I have been looking at purchasing the world map background stamp for quite some time now but could just not decide, when the Traveller stamp set came out I just knew I had to have it.  It is the perfect compliment.  I tried a different sort of fold as well with this card.  I am not sure if it has a name, so for my purposes I am going to call it the "Double Z Fold" on the account of the two fold and when opened one section looks like a Z from the top.  Of Course this card would not have been complete if I didn't use the new In Colours, here I have chosen Lost Lagoon, Mossy Meadow and Hello Honey, with a little Early Espresso thrown in.  Love the way the Colours combine together so well.  A little distressing on the edges with my distressing tool and some spritzing with the Lost Lagoon marker and the look was complete.  I was quite happy with the result.  Hope I have given you some inspiration as well.
Here is a look at the inside of the card.
 
 
Thanks for stopping by.

Sunday, September 28, 2014

Christmas Bauble


Hi Fellow Stampers,
 
Yes it is time to start thinking about Christmas again, only 87 more sleeps!!!!!!  This Christmas Bauble Stamp is one of my favourites from the Stampin Up holiday catalogue.  So many ways that you could colour it especially with the Blendabilities, which is what I have done here.  This idea came from a card I found on Pinterest by Heather Van Looy here.  I have changed things around a little to suit the stamps that I had.  Colouring with the Blendabilities came out extremely well after a short practise and steady hand.  First Christmas card done, now many more to go.
 
Thanks for looking.

Thursday, September 25, 2014

Sweet Treat Post it Note Holder


Hi fellow Stampers,
I have just realised that it has been quite some time since my last post.  I have been sick for a month and am still unable to shake the last of it.  But at least I am felling well enough to start creating again, being on holidays is helping as well.  I have been making these adorable little post it note holders.  I love the fact that they are combined with the sweet treat cups to store paper clips.  Such a sweet idea. I had bought a tutorial from Jo Dumbleton's blog Here  quite some time ago, but have not had the opportunity to make them.  First day of my holidays I made that time..  And I just love the result.  Day one of holidays done, 20 more to go.  Yeah ya!

Enjoy


Monday, August 11, 2014

Decorated Candle and Box


Hi Stampers,

I wanted to share with you this lovely creation that my downline and fellow Stamper Janet shared with us at her workshop this weekend.  I have been wanting to stamp a design for a candle for ages and Janet gave me just the inspiration that I needed.  Thanks Janet!  Here we have used the Bloom with Hope stamp set stamped onto white tissue coloured with markers and then covered with wax paper and heated on to the candle.  Easy and so cool.  Definitely inspired to make some more now.  I loved it so much that I thought it would look great presented as a gift in a box.  So homeward bound I went, and pulled out my Box Punch Board (another new tool that will be available in the Christmas catalogue released next month).  Lookie here the matching box created with colours Hello honey, tangelo twist and mossy meadow.  Just perfect.
It took me a little while to work out how to have the peek a boo window, but I will be sharing this great tip during my class at the end of the month. 

Now back to some more candles...............

Tuesday, August 5, 2014

Cased Blended Bloom


Hi Stampers,

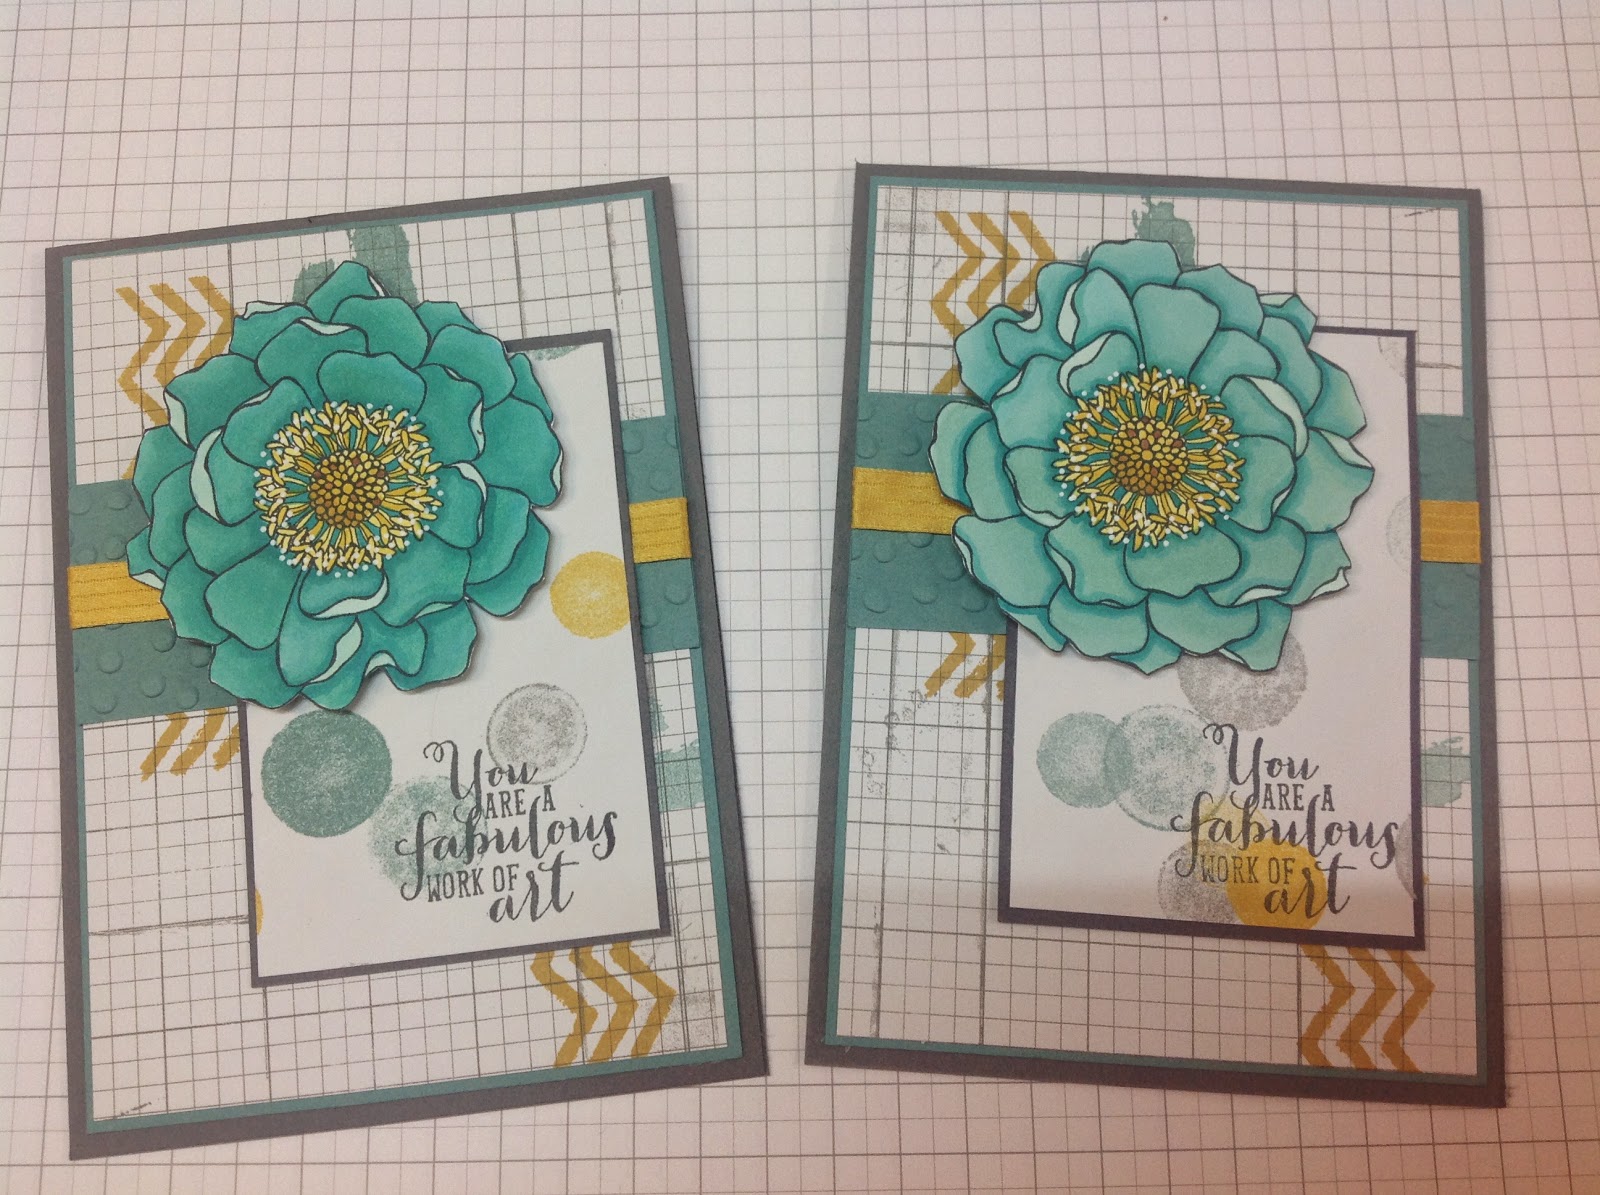
I found this card on Pinterest the other day by Sandi McIver and I just had to case (copy and share everything).  Check out her card Here she is so super talented.  I loved what she had done with the white dots around the centre of the flower.  I used my white chalk marker to achieved this.  The two cards pictured together above are examples of the two different colouring techniques using the coastal cabana blendabilities.  The one on the left is starting with the darkest colour first and working to the lightest, and the second is starting with the lightest and working to the darkest.  I normally prefer working with the blendabilities from dark to light, however for this colour set I felt I had much more success starting with the lightest.  This card also uses another of my favourite stamp sets Work Of Art.  It has so many great splotches and designs with a couple of lovely greetings as well.  All in all a lovely card I think, thanks to Sandi McIver for sharing and inspiring.


Sunday, August 3, 2014

Post it Note Holder


Hi Stampers. 
Just a quick share for you all.  Here is a project that I made recently because I had some left over coredinations Cardstock.  I love the colour scheme of the pinks and brown tones together.  I tried to make it look a little shabby chic.  Hope you like it as well.  Thanks for looking.

Saturday, August 2, 2014

Blended Bloom


Hi Stampers,
As you can see I have been having a play with my Blendabilities lately.  Here I have used the Rich Razzleberry and Daffodil Delight set.  The Rich Razzleberry goes Beautifully with the new In Colour Blackberry Bliss.  They are so much fun to play with and the Blended Bloom stamp set is just perfect for this technique.  Don't forget to use the new memento ink with your stamps when you use the blendabilities so the outline does not bleed.  Here is a close up of my colouring.
As you can see I have made my background of the flower centre show through the stamens, this was a little effort but so worth it for the desired effect.