Monday, August 11, 2014

Decorated Candle and Box


Hi Stampers,

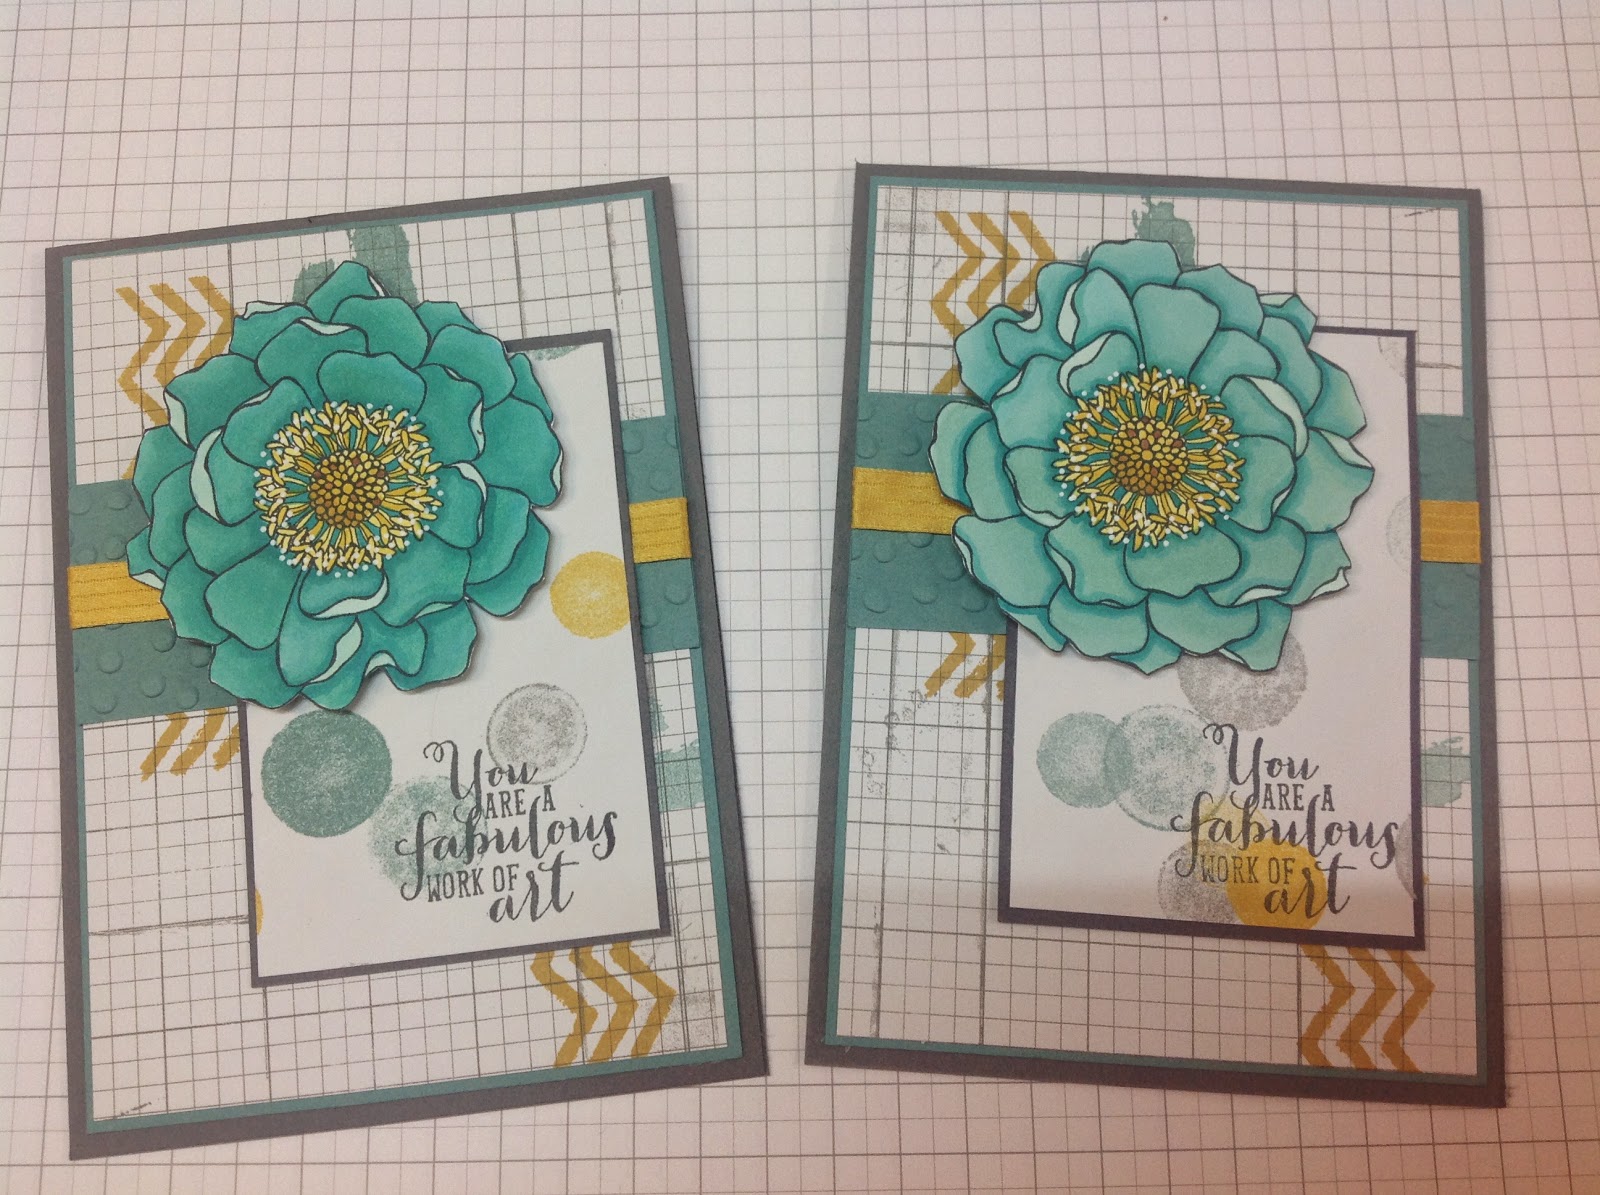
I wanted to share with you this lovely creation that my downline and fellow Stamper Janet shared with us at her workshop this weekend.  I have been wanting to stamp a design for a candle for ages and Janet gave me just the inspiration that I needed.  Thanks Janet!  Here we have used the Bloom with Hope stamp set stamped onto white tissue coloured with markers and then covered with wax paper and heated on to the candle.  Easy and so cool.  Definitely inspired to make some more now.  I loved it so much that I thought it would look great presented as a gift in a box.  So homeward bound I went, and pulled out my Box Punch Board (another new tool that will be available in the Christmas catalogue released next month).  Lookie here the matching box created with colours Hello honey, tangelo twist and mossy meadow.  Just perfect.
It took me a little while to work out how to have the peek a boo window, but I will be sharing this great tip during my class at the end of the month. 

Now back to some more candles...............

Tuesday, August 5, 2014

Cased Blended Bloom


Hi Stampers,

I found this card on Pinterest the other day by Sandi McIver and I just had to case (copy and share everything).  Check out her card Here she is so super talented.  I loved what she had done with the white dots around the centre of the flower.  I used my white chalk marker to achieved this.  The two cards pictured together above are examples of the two different colouring techniques using the coastal cabana blendabilities.  The one on the left is starting with the darkest colour first and working to the lightest, and the second is starting with the lightest and working to the darkest.  I normally prefer working with the blendabilities from dark to light, however for this colour set I felt I had much more success starting with the lightest.  This card also uses another of my favourite stamp sets Work Of Art.  It has so many great splotches and designs with a couple of lovely greetings as well.  All in all a lovely card I think, thanks to Sandi McIver for sharing and inspiring.


Sunday, August 3, 2014

Post it Note Holder


Hi Stampers. 
Just a quick share for you all.  Here is a project that I made recently because I had some left over coredinations Cardstock.  I love the colour scheme of the pinks and brown tones together.  I tried to make it look a little shabby chic.  Hope you like it as well.  Thanks for looking.

Saturday, August 2, 2014

Blended Bloom


Hi Stampers,
As you can see I have been having a play with my Blendabilities lately.  Here I have used the Rich Razzleberry and Daffodil Delight set.  The Rich Razzleberry goes Beautifully with the new In Colour Blackberry Bliss.  They are so much fun to play with and the Blended Bloom stamp set is just perfect for this technique.  Don't forget to use the new memento ink with your stamps when you use the blendabilities so the outline does not bleed.  Here is a close up of my colouring.
As you can see I have made my background of the flower centre show through the stamens, this was a little effort but so worth it for the desired effect.


Friday, July 4, 2014

Blendabilities

Hi Stampers,

I have finally been able to get my hands on these fantastic blendabilities markers.  What fun to play with.  This card was created using the Cherry Cobbler set along with a new hostess stamp set from Stampi Up called Bloom with Hope.  It is such a versatile set for birthdays, friendship and sympathy cards.
I love the way these markers can also change the colours of the clear rhinestones, as the one near the sentiment on this card.  Have you noticed the new in colour as well.  Hello Honey, in my humble opinion, is the nicest yellow in the Stampin Up colour palette. It teams perfectly with Cherry Cobbler and Basic Black in this card.  Inspiration from this card came from Mojo Monday Here.  I love a good sketch and this one was so much fun to play with.
Blendabilities are so easy to use and amazingly leave no brush lines when using Whisper White Cardstock.  Make sure that you only stamp your images with the Momento ink as other inks will fade or bleed.  Give them a go and see for yourself.
Happy stamping.

Circle Thinlits card

Hi Stampers,

In this post I will show you how to extend your circle Thinlits card to create an extra flap on the right side.  You can create two of these cards from the one sheet of A4 Cardstock. See the previous post for the completed card that was made at my workshop last weekend.


  1. Start by cutting the A4 Cardstock base of your choice at 13.8 x 21cm (the full width of the card)
  2. Using a magnetic platform place one acrylic cutting pad down, then weave your Cardstock through the die.  The 13.8cm side will sit neatly inside die and the extra piece on the end will sit on top of the cutting side of die.  Place this cutting side down on top of first plate.  Finish off  sand which with last clear acrylic plate.  See picture below.


  3. Run through bigshot, you may hear a few creaks but that is ok.  When it comes out it will look like this.


4.   Notice the score line created on the right hand side, caused by placing the Cardstock on the              opposite side to the cutting surface.  Fold with bone folder as below

5.  decorate as desired.

Thanks for looking.


Tuesday, June 24, 2014

New Colour Blackberry Bliss Card Class No 2


Hi Stampers,

Here is a sneak peek of one of the new colours that will be released next week by Stampin Up.  I have Blackberry Bliss the darker out of the two (new) teamed here with Blushing Bride (current colour).  It is just gorgeous and definitely my favourite out of the five to be released.  It is along the same tone but a few shades darker than Rich Razzleberry.  I will be making this card in my next workshop to be held this weekend 28th June 2014. 

Thanks for looking